Installing OpenCV for Java
Introduction to OpenCV for Java
As of OpenCV 2.4.4, OpenCV supports desktop Java development. This tutorial will help you install OpenCV on your desktop operating system.
Install the latest Java version
Download the latest Java JDK from the Oracle website. Now you should be able to install the last Java JDK by opening the file just downloaded.
Install the latest Eclipse version
Download the latest Eclipse version at the Eclipse Download page choosing the Eclipse IDE for Java Developers version (suggested).
Extract the downloaded compressed file and put the resulting folder wherever you want to. You don’t need to install anything. Alternatively, you can try the Eclipse installer.
Install OpenCV 3.x under Windows
First of all you should download the OpenCV library (version 3.x) from here.
Then, extract the downloaded OpenCV file in a location of your choice. Once you get the folder opencv put in wherever you prefer.
Now the only two things that you will need are: the opencv-3xx.jar file located at \opencv\build\java and the opencv_java3xx.dll library located at \opencv\build\java\x64 (for 64-bit systems) or \opencv\build\java\x86 (for 32-bit systems). The 3xx suffix of each file is a shortcut for the current OpenCV version, e.g., it will be 300 for OpenCV 3.0 and 330 for OpenCV 3.3.
Install OpenCV 3.x under macOS
The quickest way to obtain OpenCV under macOS is to use Homebrew. After installing Homebrew, you have to check whether the XCode Command Line Tools are already installed on your system.
To do so, open the Terminal and execute:
xcode-select --install
If macOS asks for installing such tools, proceed with the download and installation. Otherwise, continue with the OpenCV installation.
As a prerequisite, check that Apache Ant is installed. Otherwise, install it with Homebrew:
brew install ant.
Ant should be available at /usr/local/bin/ant.
To install OpenCV (with Java support) through Homebrew, you need to edit the opencv formula in Homebrew, to add support for Java:
brew edit opencv
In the text editor that will open, change the line:
-DBUILD_opencv_java=OFF
in
-DBUILD_opencv_java=ON
then, after saving the file, you can effectively install OpenCV:
brew install --build-from-source opencv
After the installation of OpenCV, the needed jar file and the dylib library will be located at /usr/local/Cellar/opencv/3.x.x/share/OpenCV/java/, e.g., /usr/local/Cellar/opencv/3.3.1/share/OpenCV/java/.
Please, notice that this method doesn’t work if you update OpenCV from a previous version: you need to uninstall OpenCV and install it again.
Install OpenCV 3.x under Linux
Please, note: the following instructions are also useful if you want to compile OpenCV under Windows or macOS. Linux package management systems (apt-get, yum, etc.) may provide the needed version of the OpenCV library.
As first step, download and install CMake and Apache Ant, if you don’t have any of these. Download the OpenCV library from its website.
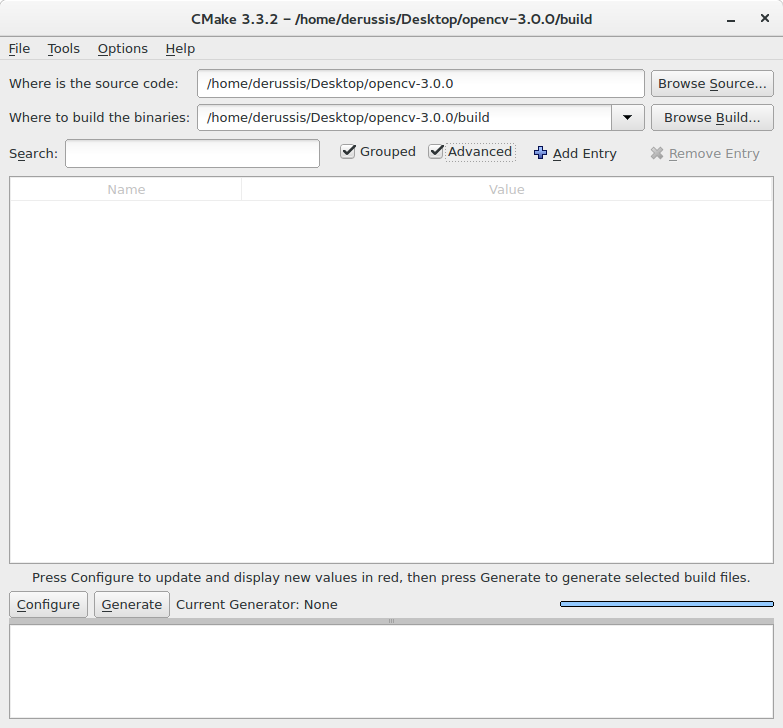
Extract the downloaded OpenCV file in a location of your choice and open CMake ( cmake-gui ).
Put the location of the extracted OpenCV library in the Where is the source code field (e.g., /opencv/) and insert the destination directory of your build in the Where to build the binaries field (e.g., /opencv/build).
At last, check the Grouped and Advanced checkboxes.
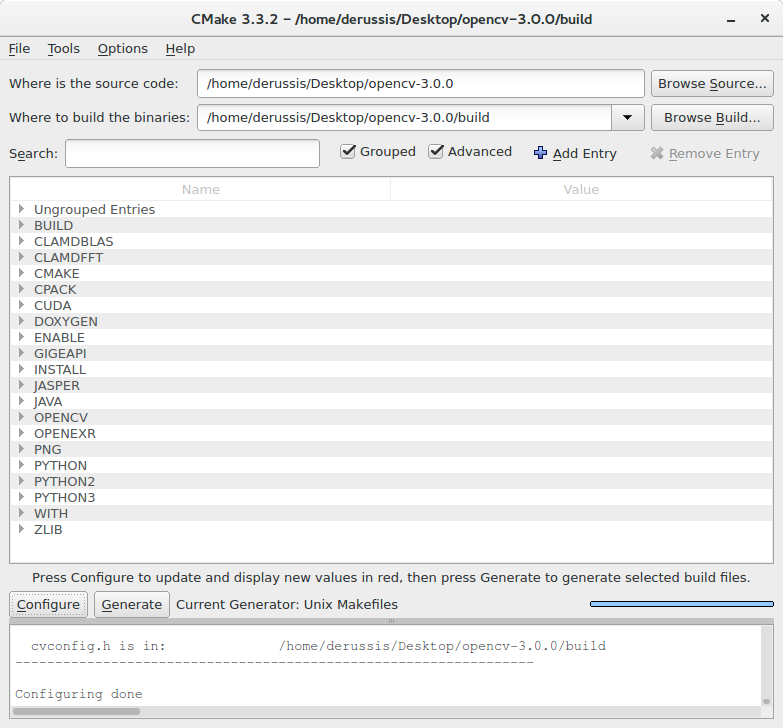
Now press Configure and use the default compilers for Unix Makefiles. Please, be sure to have installed a C/C++ compiler.
In the Ungrouped Entries group, insert the path to the Apache Ant executable (e.g., /apache-ant-1.9.6/bin/ant).
In the BUILD group, unselect:
BUILD_PERF_TESTSBUILD_SHARED_LIBRARYto make the Java bindings dynamic library all-sufficientBUILD_TESTSBUILD_opencv_python
In the CMAKE group, set to Debug (or Release) the CMAKE_BUILD_TYPE
In the JAVA group:
- insert the Java AWT include path (e.g.,
/usr/lib/jvm/java-1.8.0/include/) - insert the Java AWT library path (e.g.,
/usr/lib/jvm/java-1.8.0/include/jawt.h) - insert the Java include path (e.g.,
/usr/lib/jvm/java-1.8.0/include/) - insert the alternative Java include path (e.g.,
/usr/lib/jvm/java-1.8.0/include/linux) - insert the JVM library path (e.g.,
/usr/lib/jvm/java-1.8.0/include/jni.h)
Press Configure twice, and the CMake window should appear with a white background. If not, fix the red lines and press Configure again. Now, press Generate and close CMake.
Now open the terminal, go to the build folder of OpenCV and compile everything with the command: make -j. Notice that the -j flag tells make to run in parallel with the maximum number of allowed job threads, which makes the build theoretically faster.
Wait for the process to be completed...
If everything went well you should have opencv-3xx.jar in the /opencv/build/bin directory and libopencv_java3xx.so in the /opencv/build/lib directory. The 3xx suffix of each file is a shortcut for the current OpenCV version, e.g., it will be 300 for OpenCV 3.0 and 330 for OpenCV 3.3. This is everything you need.
Set up OpenCV for Java in Eclipse
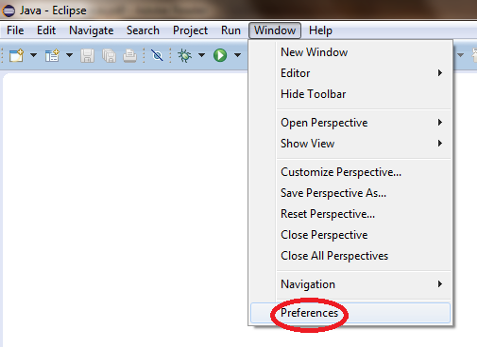
Open Eclipse and select a workspace of your choice. Create a User Library, ready to be used on all your next projects: go to Window > Preferences....
From the menu navigate under Java > Build Path > User Libraries and choose New....
Enter a name for the library (e.g., opencv) and select the newly created user library.
Choose Add External JARs..., browse to select opencv-3xx.jar from your computer.
After adding the jar, extend it, select Native library location and press Edit....
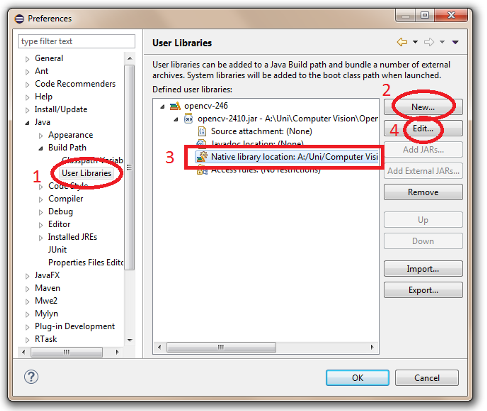
Select External Folder... and browse to select the folder containing the OpenCV libraries (e.g., C:\opencv\build\java\x64 under Windows).
In case of MacOS, if you installed OpenCV without Homebrew, you need to create a soft link with .dylib extension for the .so file. E.g., from the terminal, type:
ln -s libopencv_java300.so libopencv_java300.dylib
Set up OpenCV for Java in other IDEs (experimental)
If you are using IntelliJ, you can specify the location of the library with the VM argument -Djava.library.path=/opencv/build/lib.