Your First Java Application with OpenCV
Note
We assume that by now you have already read the previous tutorials. If not, please check previous tutorials at http://opencv-java-tutorials.readthedocs.org/en/latest/index.html. You can also find the source code and resources at https://github.com/opencv-java/
A Java application with OpenCV
This tutorial will guide you through the creation of a simple Java console application using the OpenCV library in Eclipse.
What we will do in this tutorial
- In this guide, we will:
- Create a new Java Project
- Add a User Library to the project
- Write some OpenCV code
- Build and Run the application
Create a New Project
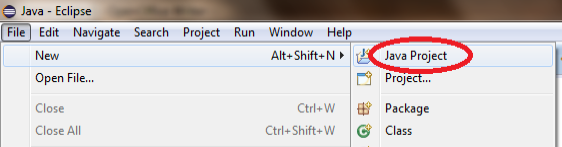
Open Eclipse and create a new Java project; open the File menu, go to New and click on Java Project.
In the New Java Project dialog write the name of your project and click on Finish.
Add a User Library
If you followed the previous tutorial (Installing OpenCV for Java), you should already have the OpenCV library set in your workspace’s user libraries; if not please check out the previous tutorial.
Now you should be ready to add the library to your project.
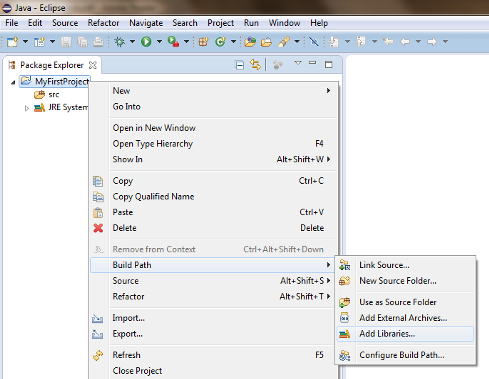
Inside Eclipse’s Package Explorer just right-click on your project’s folder and go to Build Path --> Add Libraries....
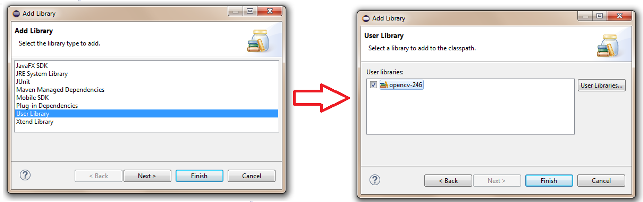
Select User Libraries and click on Next, check the checkbox of the OpenCV library and click Finish.
Create a simple application
Now add a new Class to your project by right-clicking on your project’s folder and go to New --> Class.
Write a name of your choice for both the package and the class then click on Finish.
Now we are ready to write the code of our first application.
Let’s start by defining the main method:
public class HelloCV {
        public static void main(String[] args){
                System.loadLibrary(Core.NATIVE_LIBRARY_NAME);
                Mat mat = Mat.eye(3, 3, CvType.CV_8UC1);
                System.out.println("mat = " + mat.dump());
        }
}
First of all we need to load the OpenCV Native Library previously set on our project.
System.loadLibrary(Core.NATIVE_LIBRARY_NAME);
Then we can define a new Mat.
Note
The class Mat represents an n-dimensional dense numerical single-channel or multi-channel array. It can be used to store real or complex-valued vectors and matrices, grayscale or color images, voxel volumes, vector fields, point clouds, tensors, histograms. For more details check out the OpenCV page.
Mat mat = Mat.eye(3, 3, CvType.CV_8UC1);
The Mat.eye represents a identity matrix, we set the dimensions of it (3x3) and the type of its elements.
As you can notice, if you leave the code just like this, you will get some error; this is due to the fact that eclipse can’t resolve some variables. You can locate your mouse cursor on the words that seem to be errors and wait for a dialog to pop up and click on the voice Import.... If you do that for all the variables we have added to the code the following rows:
import org.opencv.core.Core;
import org.opencv.core.CvType;
import org.opencv.core.Mat;
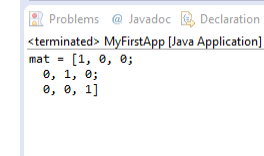
We can now try to build and run our application by clicking on the Run button. You should have the following output:
The whole source code is available on GitHub.